guides
Leather Working Fundamentals
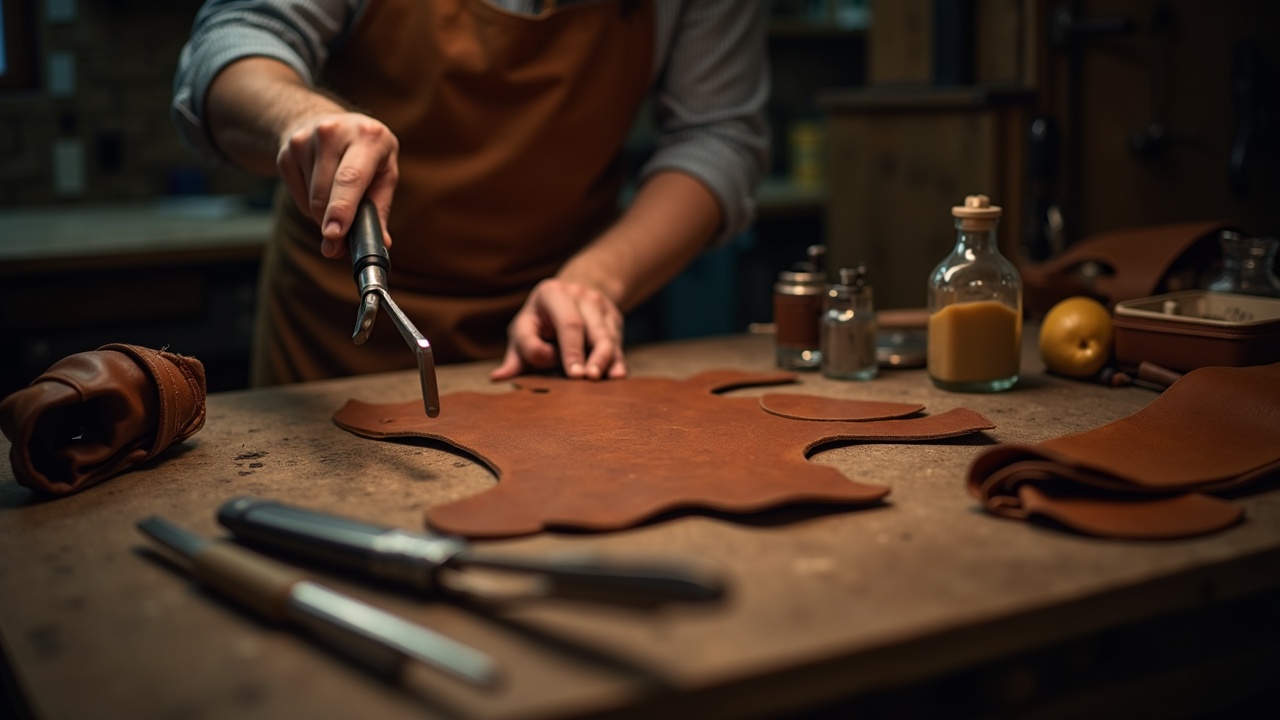
Leather working fundamentals: selecting leather types, essential tools, cutting with the grain, edge finishing, and the saddle stitch for hand sewing.
1. Introduction — Why Leather Still Matters
Synthetic materials can approximate the appearance of leather. None of them replicate the structural behavior. Leather is a natural composite — a three-dimensional matrix of collagen fibers oriented in multiple directions, tanned to resist decomposition while retaining flexibility. It molds to the shape of whatever it wraps. It develops a surface patina from use and oil absorption. It resists abrasion and puncture at thicknesses where fabric tears and plastic cracks. No polymer does all of these things simultaneously.
Leather working is among the oldest human crafts, predating metallurgy, ceramics, and weaving. Archaeological evidence places deliberate hide processing at least 7,000 years old, with bark-tanned fragments recovered from Neolithic sites across the Near East (Hodder, 2006). The fundamental process has not changed: take a preserved animal hide, cut it, shape it, join pieces together, and finish the surfaces. The tools have been refined, but a Roman leatherworker would recognize most of what happens in a modern hand-stitching shop.
This document covers the core skills. It is not a pattern book — patterns are project-specific and widely available. What matters more than any individual pattern is understanding the material, the tools, and the techniques well enough to execute any project from a sketch or a mental image. A worker who understands grain direction, thread mechanics, and edge finishing can build anything from a wallet to a saddle. A worker who follows patterns without understanding material behavior will produce work that fails at stress points, cracks at edges, and deteriorates within a year.
Every section emphasizes hand work. Machine stitching, laser cutting, and CNC skiving exist and serve production environments well. This document is for the person who wants to build things with hand tools at a bench, one piece at a time.
2. Leather Types — Material Selection Determines Everything
Tanning Methods
Vegetable-tanned leather is the only choice for tooling, carving, and wet-molding. Vegetable tanning uses polyphenolic compounds — tannins — extracted from tree bark (oak, chestnut, mimosa, quebracho). The process takes 30–60 days for full penetration into thick hides (Heidemann, 1993). The result is a firm, dense material that holds impressions from stamps and swivel knives, accepts water molding, burnishes cleanly, and develops a rich patina over years of use. Color ranges from pale cream to warm brown depending on the tannin source.
Chrome-tanned leather accounts for 80–85% of global production (Covington, 2009). Chromium(III) sulfate salts cross-link collagen fibers in roughly 24 hours. The result is softer, more uniform, and available in a wider color range because chrome-tanned leather accepts synthetic dyes more readily. It does not tool, does not burnish well, and does not mold. It is the correct choice for garments, upholstery, soft bags, and applications where drape matters more than structure. Recognizable by its blue-grey cross-section — tanners call it "wet blue."
Combination-tanned leather exists. Chrome-tanned first, then retanned with vegetable extracts. It offers some toolability with more softness than pure veg-tan. Not common in craft supply channels. If a supplier lists "chrome retan" or "combo tan," test a scrap before committing to a project.
Hide Layers
The full thickness of a hide is split into layers during processing. These layers have radically different structural properties.
Full grain — the outermost layer of the hide with the natural grain surface intact. This is the densest, strongest part of the collagen network. Tensile strength: 200–400 kg/cm² (O'Flaherty et al., 1978). Full grain shows natural marks — insect bites, scars, brand marks, stretch marks. These are not defects. They are evidence that the material is genuine and unaltered. Full grain develops patina, resists moisture, and lasts decades.
Top grain — full grain that has been lightly sanded or buffed to remove surface imperfections, then coated with a finish layer. Smoother and more uniform than full grain. Slightly less durable because some of the densest surface fibers have been removed. Common in mid-range goods. Still a good material.
Genuine leather — a marketing term that technically means "made from real leather" but in practice usually indicates a split (see below) with an artificial surface applied. The weakest structural grade sold as leather. If a product says "genuine leather" as a selling point, that is the equivalent of a restaurant advertising "real food." It is the minimum legal threshold.
Split leather — the inner layers of the hide after the grain layer has been separated. Loose fiber structure, low tensile strength, no natural grain pattern. Used for suede (the fuzzy side of a split) or bonded leather (ground and reconstituted with adhesives). Functional for linings and non-structural applications. Not suitable for load-bearing goods.
Weight and Thickness
Leather thickness is measured in ounces in the US and millimeters elsewhere. One ounce equals 1/64 inch (approximately 0.4 mm).
| Weight (oz) | Thickness (mm) | Typical Use |
|---|---|---|
| 1–2 oz | 0.4–0.8 | Linings, book covers, thin wallets |
| 3–4 oz | 1.2–1.6 | Wallets, card holders, watch straps, journal covers |
| 4–5 oz | 1.6–2.0 | Pouches, bags, sheaths, holsters |
| 5–6 oz | 2.0–2.4 | Belts (dress), satchels, messenger bags |
| 7–8 oz | 2.8–3.2 | Work belts, heavy holsters, dog collars |
| 8–9 oz | 3.2–3.6 | Knife sheaths, heavy-duty straps |
| 9–10 oz | 3.6–4.0 | Thick belts, armor components, heavy saddlery |
| 11–14 oz | 4.4–5.6 | Sole leather, heavy saddlery, industrial applications |
Sourcing. Buy from dedicated leather suppliers, not craft stores. Tandy Leather, Springfield Leather, Rocky Mountain Leather, Weaver Leather Supply, and District Leather Supply all sell hides, sides, and pre-cut panels by weight and grade. A full side of 8–9 oz vegetable-tanned cowhide (approximately 20–24 square feet) costs $120–200 depending on grade and tannery. Pre-cut panels cost more per square foot but reduce waste for small projects.
3. Tools — Start Minimal, Add as Needed
Leather working tool lists online are aspirational catalogs designed to sell inventory. A beginner needs fewer than ten tools to produce professional-quality work. Buy quality versions of the tools you actually use rather than cheap versions of everything.
Cutting Tools
Rotary cutter — a rolling razor blade, typically 28 mm or 45 mm diameter. Cuts straight lines faster and more consistently than a knife when used against a steel ruler. Ideal for straps, straight edges, and panel cutting. Replace the blade the moment it starts dragging. A dull rotary cutter is dangerous — it requires more pressure, which increases the chance of slipping off the ruler.
Utility knife or craft knife — for curves, detail cuts, and trimming. A fresh blade matters more than the brand of the handle. Some workers prefer a leather round knife for long cuts, but it requires sharpening skill. A box of disposable blades costs less than a sharpening stone.
Cutting mat — self-healing cutting mat, minimum 18 x 24 inches. Protects the blade, protects the table, and provides a reference grid. Do not cut leather on bare wood, glass, or granite — wood dulls blades, glass chips, and granite is too hard to provide clean cuts.
Layout and Marking
Steel ruler — 24-inch minimum. Cork-backed to prevent slipping. Used as a cutting guide, a straight edge for marking, and a measuring tool. Aluminum rulers get nicked by blades and produce inaccurate cuts. Spend the extra $10 on steel.
Scratch awl or silver pen — for marking cut lines on leather. A scratch awl leaves an incised line on veg-tan that disappears when the leather is dampened. Silver pens (available from leather suppliers) leave a visible line that does not bleed into dye. Do not use ballpoint pens — ink wicks into the grain and becomes permanent.
Wing divider — for scribing lines parallel to an edge. Essential for marking stitch lines at a consistent distance from the edge. Set the gap, drag one leg along the edge, and the other leg scribes a perfect parallel line. Also used for marking border lines for edge finishing.
Stitching Tools
Stitching groover — cuts a shallow groove along the stitch line. The groove serves two purposes: it guides the pricking irons for straight holes, and it recesses the thread below the leather surface so it does not wear from abrasion. Adjustable groovers allow setting the distance from the edge.
Pricking irons — sets of two-prong and multi-prong (typically 4–6 prong) chisels that create evenly spaced stitch holes. Available in different spacings measured in millimeters (typically 3 mm, 3.38 mm, 4 mm, or 5 mm). Smaller spacing produces finer stitching. For most projects, 3.38 mm spacing is the standard starting point. Quality irons from KS Blade Punch, Sinabroks, or Kevin Lee produce clean, angled holes that guide the needle path. Cheap irons tear the leather and produce ragged holes.
Hand-stitching needles — blunt-tipped harness needles, not sharp sewing needles. The holes are pre-punched by the pricking irons; the needle just passes through. Sharp needles cut new paths and produce messy stitching. Size 2 needles work for most thread sizes. Buy in bulk — they bend and break.
Waxed thread — two options dominate:
- Waxed linen (non-bonded): traditional material. Strong, natural appearance. Frays slightly at cut ends. Requires more wax application during stitching. Use for traditional-style work.
- Waxed polyester (bonded): synthetic, extremely strong, consistent diameter, available in dozens of colors. Thread ends can be melted with a lighter to prevent fraying. The practical choice for most work. Brands: Tiger Thread, NMF (Non-Metallic Filament), Wuta, or Amy Roke. 0.6 mm diameter is standard for medium-weight leather.
Thread length calculation: measure the seam length, multiply by 3.5 to 4. That gives enough thread for both needles to complete the seam with a short tail for back-stitching.
Finishing Tools
Edge beveler — a small blade that removes the sharp 90-degree corner from cut edges. Available in sizes #0 (fine) through #5 (heavy). Size #1 or #2 covers most work on 3–8 oz leather. Run the beveler along both the grain side and flesh side of every cut edge.
Burnishing tool (slicker) — a smooth piece of wood, bone, or plastic shaped to fit against the edge. Friction from rubbing at speed melts and compresses the edge fibers, creating a smooth, sealed surface. Canvas or denim cloth works as a flat burnisher.
Mallet — a rawhide, nylon, or poly mallet for driving stamps, pricking irons, and setting hardware. Do not use a steel hammer — it will damage stamp faces, crack iron handles, and dent anvils. A 12–16 oz poly mallet covers most operations.
Tooling and Carving (Veg-Tan Only)
Swivel knife — the primary cutting tool for decorative carving. A barrel-shaped handle rotates freely in the hand while the blade cuts the leather surface. The blade follows curves by rotating in the handle rather than by turning the wrist. Requires a razor-sharp edge maintained on a strop. Cheap swivel knives have poor barrel bearings and blade alignment — invest in a quality handle (Barry King, Leather Wranglers, or a well-made brass-barrel knife).
Beveler stamps — pressed against one side of a swivel knife cut, a beveler stamp pushes down the leather on one side of the line to create the illusion of depth. This is the single most-used stamp in leather carving. Smooth bevelers for clean lines, checkered or textured bevelers for decorative effects.
Modeling tools — spoon-shaped or ball-tipped tools for shaping, lifting, and defining areas within a carved pattern. Used on dampened veg-tan to push and sculpt the leather surface.
Background stamps — matting stamps, pear shaders, seeders, veiners, and camouflage stamps that fill areas around the main design elements. These create visual contrast between the carved design and the background.
4. Cutting and Layout — Respect the Grain
Grain Direction
Every hide has a grain direction determined by the alignment of collagen fibers during the animal's life. The fiber orientation is tightest along the backbone and loosest in the belly. This matters for two reasons:
- Stretch. Leather stretches more across the grain than along it. A belt cut across the grain will stretch and distort under load. A belt cut along the grain (parallel to the backbone) resists stretch and maintains its shape.
- Consistency. Pieces cut from the same area of the hide in the same grain direction will behave uniformly. Mixing grain orientations within a project produces pieces that age, stretch, and patina differently.
The backbone area — called the bend or the back — is the highest-quality section. Tight grain, even thickness, fewest defects. Belts, straps, and structural pieces come from here. Shoulders are slightly looser but still usable for most projects. Bellies are loose, stretchy, and thin — use for linings, practice pieces, or non-structural components.
Pattern Transfer
For repeatable projects, make patterns from heavy card stock, manila folder material, or thin acrylic sheet. Paper patterns shift and distort. Acrylic templates cut on a scroll saw or laser cutter are the most durable and precise option.
Transfer patterns to leather by tracing around the template with a scratch awl or silver pen. Hold the template firmly or tape it in place. Mark hole locations, fold lines, and alignment notches at the pattern stage — they are harder to add accurately after cutting.
Cutting Technique
- Straight cuts: steel ruler and rotary cutter. One pass, firm pressure, blade perpendicular to the surface. Do not saw back and forth — each pass should cut cleanly through.
- Curved cuts: sharp utility knife or leather round knife. Cut away from yourself. Rotate the leather into the blade rather than twisting the knife around curves.
- Heavy leather (8+ oz): may require multiple passes. Score the first pass lightly to establish the cut line, then increase pressure on subsequent passes. Forcing a single cut through heavy leather produces wavy edges and dulls blades.
Cut on the grain (smooth) side whenever possible. The grain side shows cut marks less than the flesh side, and cutting from the grain side gives better control of the visible edge.
5. Edge Finishing — Where Amateurs and Professionals Diverge
Unfinished edges are the most visible marker of amateur work. Raw-cut leather shows a rough, fibrous cross-section that absorbs moisture, collects dirt, and frays over time. Finished edges are smooth, sealed, and rounded — they feel comfortable against skin and resist wear.
Edge Beveling
Run a #1 or #2 edge beveler along both the grain side and the flesh side of every cut edge. This removes the sharp 90-degree corners and creates a rounded profile that burnishes more evenly. Hold the beveler at approximately 45 degrees to the surface. Pull toward yourself in a smooth, continuous stroke. Multiple light passes produce a better result than one aggressive cut.
Burnishing (Veg-Tan)
Burnishing is the preferred edge finish for vegetable-tanned leather. The process uses friction to heat and compress the surface fibers, fusing them into a smooth, hard surface.
Process:
- Bevel both sides of the edge.
- Apply a small amount of burnishing compound — water alone works, but gum tragacanth, tokonole, or beeswax produces a harder, longer-lasting finish. Water is fine for practice.
- Rub the edge vigorously with a wood slicker, bone folder, or canvas cloth. A drill-mounted burnishing wheel speeds this step considerably.
- Apply additional compound as needed. The edge should become glossy and smooth.
- For a mirror finish, burnish with beeswax as the final layer after water or gum burnishing.
Burnishing does not work reliably on chrome-tanned leather because the loose fiber structure does not compress and fuse the same way. For chrome-tan projects, use edge paint.
Edge Paint
Edge paint is a pigmented acrylic or polyurethane coating applied to the edge with a roller or applicator pen. It seals the fibers, provides a uniform color, and creates a durable surface.
Process:
- Bevel both sides.
- Sand the edge lightly with 400-grit sandpaper to level the fibers.
- Apply a thin coat of edge paint. Let it dry completely (typically 20–30 minutes).
- Sand lightly with 600-grit sandpaper to knock down any bumps.
- Apply a second coat. Two to three coats with sanding between each is standard.
Brands: Uniters, Fenice, Giardini. Available in every color imaginable. Match or contrast with the leather color depending on the design intent.
Edge Finishing Sequence (Summary)
| Step | Tool/Material | Purpose |
|---|---|---|
| 1 | Edge beveler | Remove sharp corners |
| 2 | Sandpaper (220–400 grit) | Level fibers, smooth surface |
| 3 | Burnishing agent or edge paint | Seal and harden the edge |
| 4 | Slicker or applicator | Apply finish by friction or coating |
| 5 | Fine sandpaper (600 grit) | Between coats (edge paint only) |
| 6 | Final coat or wax | Seal and protect |
6. Hand Stitching — The Saddle Stitch
Machine stitching uses a lock stitch — one thread on top, one on the bobbin, interlocked in the middle. If the thread breaks at any point, the entire seam unravels in both directions from the break.
Saddle stitching uses one continuous thread with a needle on each end, passing through every hole from opposite sides. Each stitch is structurally independent. Break the thread at one point and every other stitch remains locked in place (Stohlman, 1977). A saddle-stitched seam is stronger than the leather it holds together.
Setup
- Mark the stitch line using a wing divider set 3–5 mm from the edge (distance depends on leather weight and design).
- Cut the stitch groove with a stitching groover.
- Punch holes using pricking irons. Start with the two-prong iron at the beginning of the line. Place one prong of the multi-prong iron in the last hole of the previous set to maintain consistent spacing. Drive the iron through with a mallet, perpendicular to the surface.
- Cut thread to 3.5–4 times the seam length.
- Thread both needles. Thread approximately 2–3 inches through each needle eye, then pierce the thread with the needle tip about 1 inch from the end, pulling tight to lock the thread on the needle.
Stitching Technique
- Push the right needle through the first hole from the back side.
- Center the thread so equal lengths extend from both sides.
- Push the right needle through the second hole from right to left.
- Push the left needle through the same hole from left to right, passing behind (under) the right needle's thread.
The critical detail: the left needle always passes behind the right needle's thread as it goes through the hole. This creates a consistent diagonal pattern on the front surface. If you alternate which needle goes behind, the stitching will look uneven — some stitches will angle one direction, others the opposite.
- Pull both threads tight with equal tension. Consistent tension produces even stitching.
- Repeat for every hole.
- At the end of the seam, back-stitch two to three holes by reversing direction, then cut the thread and melt the ends with a lighter (polyester) or tuck them (linen).
Common Mistakes
- Inconsistent tension: produces stitches of different sizes. Pull with the same force every time.
- Wrong needle order: the same needle must always go first. Pick left or right and be consistent.
- Thread crossing in the hole: if both needles collide inside the hole, one needle is piercing the other's thread. Angle the needles to avoid this. A stitching clam (a wooden clamp that holds the work upright) makes this easier because both hands are free.
- Starting without a groove: ungrooved stitching sits proud of the surface and wears through faster. Always groove.
Stitching Clam
A stitching clam (also called a stitching pony or stitching horse) holds the leather upright between padded wooden jaws, freeing both hands for stitching. This is not optional equipment for serious work — trying to saddle stitch while holding the leather flat on a table is like trying to saw a board without a vise. Build one from two hardwood boards, a hinge, and a bolt, or buy one for $30–80.
7. Tooling and Carving — Veg-Tan Only
Leather tooling is the process of creating decorative relief patterns on dampened vegetable-tanned leather using a swivel knife and stamps. Chrome-tanned leather cannot be tooled — the soft, loose fiber structure does not hold impressions.
Casing the Leather
"Casing" means dampening the leather to the correct moisture level for tooling. Too wet and the leather is mushy — cuts spread and stamps leave no definition. Too dry and the leather resists the knife and rebounds from stamp impressions.
Method: sponge clean water evenly onto the grain side. Let it soak in until the color shifts from light tan to a uniform medium brown — typically 10–20 minutes depending on thickness. The leather should feel cool and pliable, with no standing water on the surface. If you press a fingernail into the surface and the impression remains sharp, the leather is properly cased.
Thick leather (8+ oz) may need to be dampened from both sides. Leather will dry out as you work — re-dampen sections as needed to maintain workability.
Transferring Patterns
- Print or draw the design on tracing film or vellum (not paper — paper fibers transfer and stain wet leather).
- Tape the pattern to the cased leather.
- Trace over every line with a stylus or dried-out ballpoint pen. Press firmly enough to leave a visible impression in the damp leather without cutting through the tracing film.
- Remove the pattern. The design lines should be clearly visible as depressed lines on the leather surface.
Swivel Knife Cuts
The swivel knife makes every primary cut in the design. Hold the barrel between thumb and middle finger. The index finger rests on top of the yoke for downward pressure. The barrel rotates freely as you draw the blade through curves.
Cut depth: approximately one-half to two-thirds of the leather thickness. Too shallow and the beveler cannot push the leather down beside the cut. Too deep and the blade cuts through, or the leather separates into layers.
Blade angle: hold the blade perpendicular to the surface for straight lines. For tight curves, tip the blade slightly in the direction of the turn.
Sharpening: strop the blade on smooth leather loaded with chromium oxide or diamond compound before every session. A swivel knife that does not cut cleanly makes everything downstream worse — rough cuts produce rough bevel impressions, which produce amateur-looking finished work.
Beveling
After all swivel knife cuts are complete, bevel one side of each cut using a beveler stamp and mallet. The beveler pushes down the leather on the side away from the design element you want to stand in relief. This creates the three-dimensional illusion.
Place the smooth face of the beveler against the cut line at approximately 45 degrees. Strike once with the mallet. Advance the stamp by half its width and strike again. Overlap each impression to produce a smooth, continuous bevel without visible stamp marks.
Texturing and Backgrounding
After beveling, fill background areas with matting stamps (cross-hatched or dimpled patterns) to push those areas further below the design level. This increases visual contrast.
Apply decorative textures with specialized stamps — veiners for leaf veins, seeders for flower centers, pear shaders for gentle shading gradients, camouflage stamps for bark textures.
8. Dyeing and Finishing — Color, Protection, and Aging
Aniline Dye (Alcohol-Based)
Aniline dyes are transparent, penetrating dyes that color the leather without hiding the grain pattern. They soak into the fiber structure rather than sitting on the surface. Available in alcohol-based (faster drying, more vivid) and water-based (slower, more even) formulations.
Application:
- Ensure the leather is clean and dry. Any oil, fingerprints, or residue will resist dye and create light spots.
- Apply dye with a wool dauber, sponge, or airbrush. Work in circular motions for even coverage. Do not stop in the middle of a surface — dye pools where you pause.
- Let the first coat dry fully (15–30 minutes for alcohol-based).
- Apply a second coat for deeper color. Two light coats produce more even color than one heavy coat.
- Buff with a clean cloth after drying to remove loose dye particles.
Coverage note: alcohol-based aniline dyes (Fiebing's is the industry standard) dry fast and build color quickly. They also emphasize grain texture and tooling depth, which is why they are preferred for carved work.
Antique Finish
Antiquing creates contrast in tooled and carved work by depositing dark pigment in the low areas (cuts, beveled areas, background stamps) while wiping it from the high points.
Process:
- Dye the leather first with a base color and let it dry completely.
- Apply a coat of resist (acrylic finish or leather sheen) to the entire surface. Let dry. This prevents the antique stain from penetrating the high points.
- Apply antique paste or gel over the entire surface, working it into all the carved and stamped areas.
- Wipe the surface with a soft cloth, removing antique from the high points while leaving it in the low areas.
- Seal with a final coat of acrylic finish.
Acrylic Finish (Resolene / Leather Sheen)
Acrylic finishes serve as a protective topcoat. They seal the dye, add a degree of water resistance, and control sheen level (matte, satin, or gloss).
Application: thin with water (50/50 for most applications — straight from the bottle is too thick and builds up unevenly). Apply with a sponge or spray gun in thin, even coats. Two to three coats with drying time between each.
Resolene (from Fiebing's) is the most common acrylic leather finish. It tends toward high gloss — cut with water or apply very thin coats for a more natural look. Alternatives: Satin Shene (lower gloss), Super Shene, or Bee Natural leather finish for a no-sheen protective layer.
Conditioning
Finished leather goods need periodic conditioning to maintain flexibility and prevent drying and cracking. Neatsfoot oil (pure — not "compound," which contains mineral oil) is the traditional conditioner. Apply sparingly with a cloth. It darkens leather slightly. Leather balm (beeswax + oil blends) conditions without significant darkening.
Condition before the leather feels dry. Once surface cracking appears, the collagen fibers are damaged and conditioning cannot fully reverse the degradation.
9. Hardware — Rivets, Snaps, Buckles, and Chicago Screws
Rivets
Single-cap rivets — a cap on one side, a post on the other, joined by compression. Fast, permanent, and clean-looking. Set with an anvil (flat base) and a rivet setter (concave tool that fits over the cap). Available in nickel, brass, antique brass, copper, and black oxide.
Double-cap rivets — caps on both sides. Looks finished from every angle. Same setting process. Slightly more expensive.
Setting process:
- Punch a hole through both layers of leather using a rotary punch or drive punch. Hole diameter should match the rivet post diameter exactly.
- Insert the post through both layers from the back (flesh side).
- Place the cap on the post.
- Set the piece on the rivet anvil (cap side down).
- Place the setter over the post end and strike firmly with a mallet — one to two solid hits. Over-striking mushrooms the post and looks sloppy.
Post length selection: the post must extend through all layers of leather plus approximately 2 mm. Too short and the rivet will not clinch. Too long and the excess material buckles or bends. Measure your leather stack and select the correct post length.
Snaps
Line 20 and Line 24 snaps are the standard sizes for leather goods. Line 24 is larger and holds more firmly — use for closures on bags, holsters, and cases. Line 20 for lighter applications.
Each snap has four components: cap, socket, stud, and post. Cap and socket form the female side. Stud and post form the male side.
Setting: requires a snap setter kit — a matched set of anvil and punch for each component. The tools are specific to the snap size and brand. Buy setter kits from the same manufacturer as the snaps to ensure fit.
Buckles
Standard belt buckles attach via a leather loop folded over the buckle bar and secured with rivets or stitching (or both). Roller buckles have a small roller on the bar that reduces wear on the belt where the tongue bends.
Buckle attachment: fold 2–3 inches of the belt strap over the buckle bar. Punch holes for two rivets or stitch a reinforced seam. Both methods work. Using both rivets and stitching is strongest.
Chicago Screws (Screw Posts)
Two-piece fasteners: a flat-head screw and a threaded post. They allow non-permanent assembly — the pieces can be disassembled and reassembled. Useful for items that need occasional hardware replacement (interchangeable belt buckles, adjustable straps).
Setting: punch a hole, insert the post from one side, thread the screw into the post from the other side. Apply a small drop of thread-locker (Loctite Blue 242) to prevent the screw from backing out with use.
Available in nickel, brass, antique brass, black, and solid copper. Post lengths range from 4 mm to 20 mm to accommodate different leather thicknesses.
10. Beginner Projects — Build Skill by Building Things
These projects are ordered by difficulty. Each one introduces new skills that build on the previous project. Resist the temptation to skip to a complex project — the muscle memory and material understanding gained from simple work prevents expensive mistakes later.
Project 1: Card Holder
Skills practiced: cutting, edge finishing, saddle stitching. Material: 3–4 oz vegetable-tanned leather, two pieces approximately 4 x 3 inches (card pocket) and 4 x 4 inches (body). Process:
- Cut both pieces using a rotary cutter and steel ruler.
- Bevel and burnish all edges on the pocket piece that will be exposed (the top edge of the card slot).
- Align the pocket piece on the body piece. Mark stitch lines on both sides and the bottom with a wing divider.
- Groove, punch, and saddle stitch.
- Bevel and burnish all remaining edges of the assembled piece.
- Dye and finish if desired.
Why this project first: it requires only three skills (cutting, stitching, burnishing) and produces something immediately useful. Total time: 1–2 hours. Materials cost: $5–8.
Project 2: Belt
Skills practiced: long straight cuts, hardware attachment, hole punching, heavy leather handling. Material: 8–9 oz vegetable-tanned leather, one strap approximately 1.5 inches wide and 42–52 inches long (waist measurement + 10 inches). One buckle, two rivets or Chicago screws. Process:
- Cut the strap. A strap cutter produces the most consistent width, but a rotary cutter against a steel ruler works if the ruler is long enough.
- Round or point the tip end (the end that passes through the buckle).
- Punch belt holes — five holes spaced 1 inch apart, starting approximately 1 inch from your measured waist size.
- Fold the buckle end over the buckle bar and secure with rivets or Chicago screws.
- Bevel and burnish all edges — this takes longer on a belt than on a card holder, but it is the step that separates a handmade belt from a factory product.
- Dye, condition, and finish.
Why this project second: it introduces hardware setting and working with heavy leather while still requiring only straight cuts and no stitching (unless you choose to stitch the buckle fold).
Project 3: Knife Sheath
Skills practiced: wet molding, curved stitching, fitting to an object, edge finishing on a three-dimensional object. Material: 7–8 oz vegetable-tanned leather, one piece large enough to wrap around the knife blade with 3/4-inch seam allowance. Process:
- Trace the knife profile and create a pattern with seam allowance on card stock.
- Cut the leather.
- Soak the leather in warm water for 5–10 minutes until fully saturated.
- Wrap the wet leather around the knife (wrap the blade in plastic wrap first to prevent moisture damage). Mold with fingers and a modeling tool.
- Clamp the edges together and let the leather dry partially — enough to hold its shape but still workable for stitching.
- Mark, groove, punch, and saddle stitch the seam.
- Allow full drying (12–24 hours).
- Bevel, burnish edges, dye, and finish.
Why this project third: wet molding is a skill unique to vegetable-tanned leather and opens up three-dimensional construction (holsters, cases, armor, masks, saddlery).
Project 4: Drawstring Pouch
Skills practiced: curved pattern cutting, multiple piece assembly, grommet or eyelet setting, lace preparation. Material: 4–5 oz vegetable-tanned or chrome-tanned leather, one circular or oval piece for the base, one rectangular piece for the body. Process:
- Cut a circle (6–8 inches diameter) for the base and a rectangle whose length equals the circle's circumference plus seam overlap.
- Punch holes or set grommets along the top edge of the body for the drawstring.
- Stitch the body into a cylinder (seam along the short edge).
- Stitch the cylinder to the circular base.
- Thread a leather lace or waxed cord through the grommets.
- Finish edges and surfaces.
Why this project fourth: assembling three-dimensional shapes from flat pieces teaches planning, pattern math, and multi-seam construction.
11. Sources
- Covington, A. D. (2009). Tanning Chemistry: The Science of Leather. RSC Publishing.
- Heidemann, E. (1993). Fundamentals of Leather Manufacturing. Eduard Roether KG.
- Hodder, I. (2006). Çatalhöyük: The Leopard's Tale. Thames & Hudson.
- Lua, A. C., & Yang, T. (2004). Effects of vacuum pyrolysis conditions on the characteristics of activated carbons derived from pistachio-nut shells. Journal of Colloid and Interface Science, 274(2), 594–601.
- Michael, V. (2006). The Leatherworking Handbook. Cassell.
- O'Flaherty, F., Roddy, W. T., & Lollar, R. M. (1978). The Chemistry and Technology of Leather. Krieger Publishing.
- Salaman, R. A. (1986). Dictionary of Leather-Working Tools, c. 1700–1950. Macmillan.
- Stohlman, A. (1977). The Art of Hand Sewing Leather. Tandy Leather.
- Stohlman, A., Wilson, A. D., & Patten, J. R. (1969). Leatherwork Manual. Tandy Leather.
- Richards, M. (2004). Making Leather Knife Sheaths, Volumes 1–3. Schiffer Publishing.
Tags: [practical-skills] [advanced]